Hardwood Flooring Installation Timeline: What to Expect
A Realistic Timeline for Hardwood Flooring Installation
When you decide to renovate your home, hardwood flooring installation is one of the most significant changes you can make. It brings warmth, elegance, and durability to your living space. However, installing hardwood floors isn’t a simple task, there’s a specific process and timeline to follow. Understanding the timeline will help you prepare and set realistic expectations for your home remodel.
This blog breaks down each step of the hardwood flooring installation process, providing you with a clear timeline from start to finish. Whether you’re opting for engineered vs solid hardwood flooring or looking for the best options for residential and commercial flooring, we’ve got you covered.
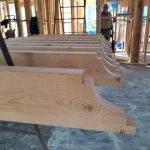
Days 1-7: Acclimating Your Floors
Before your hardwood flooring installation begins, it’s crucial to allow the hardwood to acclimate to the room’s temperature and humidity. This acclimation period ensures the wood expands or contracts appropriately after installation.
- Why is acclimation necessary?: Hardwood is naturally porous and reacts to its environment. If you skip this step, your floors could warp or shrink, compromising the final result.
- What happens during this phase?: Your flooring contractors will leave the planks in the room where they’ll be installed. It’s recommended that they remain there for 5-7 days before installation.
During this acclimation period, make sure the room is maintained at a consistent temperature (60°F to 80°F) with relative humidity between 30% and 50%. If you need advice or help understanding how to manage this phase, learn more about preparing for hardwood floor installation here.
Days 5-7: Removing Your Furniture
Now that the flooring has acclimated, it’s time to prepare your room. One of the most important aspects of preparation is removing all furniture, electronics, and personal items.
- Why is furniture removal necessary?: The area needs to be entirely clear to allow the contractors to work efficiently and avoid damaging your items. This process typically takes 1 to 2 days, depending on the size of the room and the amount of furniture.
- Protecting your belongings: If you’re worried about the heavy furniture, consider hiring professionals to help with the removal. It’s always a good idea to store fragile or valuable items in a safe place during the installation.
For professional services in moving furniture and protecting your home, check out our home remodeling services.
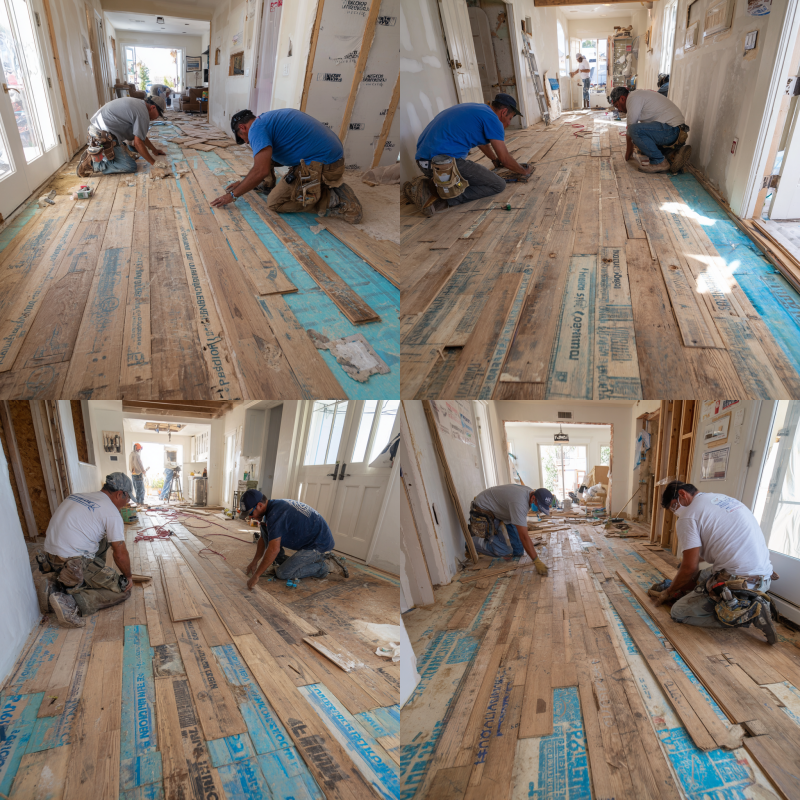
Days 8-10: Removing Your Old Floors
If you’re replacing existing floors, this phase involves removing the old flooring. Whether you have carpet, tile, or previous hardwood, this step is essential.
- What happens during this phase?: Your hardwood floor contractors will carefully remove the existing flooring, ensuring that the subfloor is intact. Any nails, glue, or staples left behind are also removed.
- Subfloor preparation: If the subfloor is damaged or uneven, it may need to be repaired or replaced before the new hardwood can be installed.
If you’re unsure about how to prepare your space for a hardwood flooring installation, we provide expert advice on subfloor inspections.
Estimated Amount of Floor Removed Per Day
Typically, contractors can remove up to 150-200 square feet of flooring per day. Depending on the material and condition of the existing floor, the removal process may take more or less time.
Days 11-15: Installing Your New Floors
This is where the transformation begins. Once the old floors have been removed and the subfloor is prepared, it’s time for the hardwood flooring installation.
- Layout and Design: The installation process starts with the layout of the floor. Whether you’re choosing a traditional or modern hardwood flooring design, the layout and alignment of each plank are essential for a seamless finish.
- Installation: Each plank is laid down, either nailed or glued to the subfloor, depending on the type of hardwood. This part of the process can take 4 to 5 days, especially for larger rooms.
For advice on choosing the right material, check out our flooring guide.
Days 16-20: Staining and Finishing (Optional)
If you opted for unfinished hardwood, this phase involves staining and finishing your floors. These steps add color, texture, and protection to the wood.
- Staining: The wood is stained to the desired shade. Staining not only enhances the natural grain but also helps protect the surface from wear and tear.
- Finishing: Multiple layers of finish are applied, allowing each to dry before applying the next. The finish protects your hardwood floors from moisture, scratches, and stains.
This phase can take between 3 to 5 days. If you want to learn more about how to care for your new floors, visit our blog on flooring care.
Days 21-22: Quarter Round, Cleanup, and Move-In
After the finishing is done, it’s time for the final touches.
- Quarter-round installation: Quarter-round moldings are placed along the edges of the room to cover any gaps and provide a finished look.
- Final cleanup: Dust and debris are removed, and your room is cleaned up thoroughly.
- Move-In: Your furniture is moved back in, and the room is ready for use.
At this stage, your beautiful new hardwood floors are ready for you to enjoy.
Tips to Speed Up the Hardwood Flooring Installation Process
If you’re looking to speed up the hardwood flooring installation process without sacrificing quality, there are several steps you can take. These strategies can help reduce the installation timeline while still ensuring that your floors are properly installed and finished.
Order Your Hardwood Flooring in Advance
One of the most effective ways to avoid delays in your hardwood flooring installation is by ordering your flooring materials well in advance.
- Why Order Early? By ordering early, you ensure that your materials arrive on time and you’re not waiting for back-ordered items. This is particularly important if you’re opting for engineered vs solid hardwood flooring, as some specialty styles may take longer to source.
- Plan Ahead: Consider ordering your flooring at least a few weeks in advance of your scheduled installation date. This will give you ample time for any unforeseen issues that might arise with the delivery or availability.
For expert advice on ordering your flooring materials, contact us today to discuss the best options for your home.
Schedule Your Installation for When You’ll Be Out of the House
Scheduling the installation during a time when you’re not at home allows your hardwood floor contractors to work without interruptions.
- Why This Helps: When you’re not present, contractors can work at their own pace and focus entirely on the installation. This prevents any time lost in waiting for decisions or clearing obstacles.
- Plan Ahead: If possible, schedule the installation when you’re away for a couple of days. This way, contractors can complete the job without delay and without any distractions.
This is especially useful for large-scale residential and commercial flooring projects where minimal interference will help expedite the process.
Choose a Prefinished Hardwood Floor
Opting for prefinished hardwood flooring is one of the quickest ways to speed up the installation process.
- Time-Saving Benefits: Prefinished hardwood floors come with the stain and finish already applied in the factory. This means your hardwood flooring installation is faster because no additional drying time or finishing is required after the installation.
- Instant Use: You can walk on prefinished hardwood floors immediately after installation, which allows you to enjoy your new space right away.
If you’re considering prefinished hardwood flooring for your next project, learn more about its benefits in our flooring installation guide.
Choose a Floating Floor Installation
A floating floor system is another way to speed up the hardwood flooring installation process. Floating floors do not require nails or glue and are laid directly over the existing subfloor.
- Quicker Installation: Since floating floors don’t need to be glued or nailed down, the process is much faster. The planks are simply clicked or locked together, making the installation process easier and quicker.
- Less Mess: Floating floor systems also reduce the mess that typically comes with other installation methods, as they do not require adhesives.
This method is particularly suitable for residential and commercial flooring applications that need to be completed quickly.
Choose a Simple Floor Pattern
Choosing a simple floor pattern is another effective way to reduce the time required for your hardwood flooring installation.
- Straightforward Layouts: Opting for a basic layout like a straight lay pattern or parallel alignment helps contractors work faster compared to intricate patterns like herringbone or chevron.
- Time Efficiency: Complex designs require additional cuts and precision, which can extend the installation timeline. A simple pattern allows contractors to complete the job more efficiently.
For easy-to-install patterns, check out our flooring options page to find the perfect design for your space.
Hire a Professional Hardwood Floor Contractor
Hiring a skilled hardwood floor contractor is one of the best ways to ensure that your hardwood flooring installation is completed quickly and correctly.
- Professional Efficiency: With years of experience, a professional will handle every aspect of the installation process, from subfloor inspection to precise alignment. Their expertise ensures the project moves forward without unnecessary delays.
- Proper Tools and Equipment: Professionals have access to specialized tools and equipment that speed up the installation process. This ensures your hardwood flooring is installed efficiently and to the highest standards.
If you’re ready to work with experienced professionals for your hardwood flooring installation, contact us today to schedule a consultation.
Cost of Professional Floor Installation Services
The cost of hardwood flooring installation varies depending on several factors, such as:
- Room size
- Type of hardwood
- Installation complexity
For a personalized estimate, contact us and get a detailed quote for your home.
How Long Does It Take to Install Hardwood Floors?
On average, hardwood flooring installation takes 3 to 4 weeks. The timeline can vary based on the size of the room and the type of wood you choose. Larger projects or intricate designs may require more time, while smaller rooms or prefinished floors may take less.
What to Expect in Each Step When Installing Hardwood Floors
Each stage of the hardwood flooring installation process is essential for ensuring a perfect result. By following the steps outlined in this timeline, you can manage your expectations and ensure that your new floors are everything you envision.
How Soon Can You Walk on Hardwood Floors After Installation?
After the floors are installed, it’s essential to wait at least 24-48 hours before walking on the hardwood flooring. If you chose unfinished hardwood, it might take a bit longer for the finishes to cure fully.
How Long Does It Take to Install 500 Square Feet of Hardwood Floors?
Installing 500 square feet of hardwood flooring typically takes around 3 to 5 days, depending on the complexity of the installation and the type of wood.
Is It Worth Installing Hardwood Floors Yourself?
While DIY installation is possible, it’s often recommended to hire hardwood floor contractors to ensure the job is done correctly. Professional installation minimizes mistakes and ensures your hardwood flooring installation will last for years.
Learn More About Hardwood Flooring Installation & ServicesMore from Flooring
If you’re interested in learning more about hardwood flooring installation or need expert help, visit our flooring services page.
Preparation for Hardwood Floor Installation
Proper preparation is the foundation of a successful hardwood flooring installation. This includes clearing the room, inspecting the subfloor, and making sure the space is ready for the new floors.
Subfloor Inspection and Preparation
Before installing hardwood flooring, it’s essential to inspect the subfloor for any imperfections. This step ensures that the new hardwood will be securely installed and free of issues like sagging or moisture problems.
Acclimation of Hardwood Flooring
As mentioned earlier, the acclimation of hardwood flooring is crucial for preventing problems like expansion or contraction. If you’re unsure about how to manage the acclimation process, reach out to our experts.
Installation Process Overview
The installation process involves laying the hardwood planks, securing them to the subfloor, and ensuring proper alignment. It’s a step-by-step process that requires attention to detail and precision.
Post-Installation Care and Maintenance
After your hardwood flooring installation, it’s essential to care for your floors properly. Regular cleaning and maintenance will ensure your hardwood lasts for years and continues to look beautiful.
Your Hardwood Flooring Installation Journey
Understanding the hardwood flooring installation timeline is key to a successful remodel. From acclimating the wood to the final clean-up, each step plays a crucial role in achieving the best results. By hiring experienced hardwood floor contractors and choosing the right materials, you can streamline the process and enjoy beautiful, durable floors in no time.
Ready to start your hardwood flooring installation? Contact us today for a professional consultation!
Ready to Transform Your Home?
At Mazzamuto Construction, we believe great spaces start with thoughtful planning and skilled craftsmanship. Whether you’re exploring ideas or ready to build, our team is here to guide you every step of the way. Let’s bring your vision home—reach out for a personalized consultation today!
Frequently Asked Questions
1. How do I install hardwood floors?
Learn more here about the steps involved in hardwood flooring installation.
2. How much does it cost to install hardwood floors?
The cost of hardwood flooring installation depends on several factors. Get an estimate by visiting our contact page.
3. How much is hardwood flooring installation cost per square foot?
Typically, hardwood flooring installation costs between $6 and $12 per square foot, depending on material and room size.
4. How long does it take to install hardwood floors?
On average, hardwood flooring installation takes 3-4 weeks, depending on the space and complexity of the job.
5. Can I walk on my hardwood floors immediately after installation?
It’s recommended to wait 24-48 hours before walking on hardwood flooring after installation.
6. Should I choose solid or engineered hardwood?
For areas with high moisture, engineered vs solid hardwood flooring may be the better option. Learn more about the differences in our flooring guide.
7. How long does it take to install 500 square feet of hardwood floors?
Installing 500 square feet of hardwood flooring typically takes 3-5 days.
8. Is it worth installing hardwood floors yourself?
While DIY is possible, hiring hardwood floor contractors ensures the job is done correctly and efficiently. Visit our contact page for a professional consultation.
Key Takeaways
- Hardwood flooring installation is a multi-step process that typically takes 3-4 weeks.
- Proper preparation, including acclimation and subfloor inspection, is essential for a successful project.
- Hiring professional hardwood floor contractors can speed up the process and ensure high-quality results.
- Post-installation care and maintenance are important for maintaining the beauty and durability of your hardwood floors.