How Do I Install Hardwood Floors? A Complete Step-by-Step Guide
How Do I Install Hardwood Floors?
When it comes to home remodeling, installing hardwood floors is one of the most rewarding projects you can undertake. Whether you’re considering a new look for your living room or renovating the entire house, learning how do I install hardwood floors is key. In this guide, we’ll walk you through everything you need to know about the installation process.
Wondering How to Install Hardwood Floors?
Before diving into the installation, it’s essential to understand the basics of hardwood flooring installation. Many people wonder, how do I install hardwood floors? The answer lies in a systematic process that includes preparation, tool gathering, and a series of steps that ensure a smooth finish.
Types of Hardwood Floors
There are two main types of hardwood floors: solid hardwood and engineered hardwood. Each type has its own installation method and is suited for different environments. Solid hardwood is more traditional, while engineered hardwood is designed for more humid environments. Understanding these differences will help you choose the right option for your home.
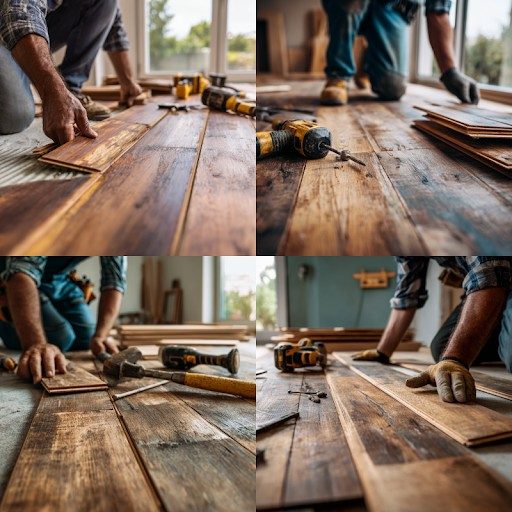
How to Install Hardwood Floors in 9 Steps
Installing hardwood floors may seem daunting, but with the right approach, it’s a manageable project. Here’s a step-by-step guide to answer the question, how do I install hardwood floors:
Gather Tools and Supplies
Before starting, make sure you have all the tools you’ll need, such as a hammer, nails, measuring tape, chalk line, and a saw. You can also refer to our flooring sales and installation services for more information on supplies.
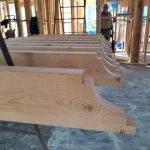
Prepare the Subfloor
A solid, clean, and level subfloor is essential. If you have an existing floor, it’s important to remove it before laying the new hardwood. Make sure the subfloor is free of moisture and level. Our team provides professional home additions and subfloor inspection services.
Arrange the Planks
Before installation, arrange the planks in the room to ensure they fit properly and to check the layout. This step will help you visualize the final look.
Lay the First Row
The first row is crucial for the rest of the installation. Lay the first row along the longest wall, making sure to leave a small gap for expansion. It’s essential to start with a straight line.
Pre-Drill First-Row Pilot Holes
Pre-drill holes in the first row to prevent the wood from splitting. This is especially important for harder woods.
Nail Down the First Row
Using nails or a flooring nailer, secure the first row of planks into place. It’s important to nail every few inches to ensure a tight fit.
Lay Second Row
Continue laying down the second row of planks, making sure the seams are staggered for a natural look.
Nail Down the Second Row
Once the second row is in place, secure it with nails. Keep checking for gaps and unevenness as you work your way across the floor.
Install the Trim and Moldings
Once the floor is fully installed, add trim and moldings along the edges to complete the look. The final step will be adding finishing touches to ensure the flooring is securely in place.
Hardwood Flooring Options
When choosing the best flooring for your space, you need to decide between solid hardwood vs. engineered hardwood. Solid hardwood offers timeless appeal, while engineered hardwood provides better moisture resistance.
Solid Hardwood vs. Engineered Hardwood
Solid hardwood floors are one piece of wood, whereas engineered hardwood consists of a layer of wood on top of a plywood base. Both have their pros and cons, depending on your installation space.
Popular Wood Species for Flooring
Some popular wood species for flooring include oak, maple, cherry, and walnut. Each species offers unique aesthetics and durability.
Hardwood Flooring Installation Tools and Materials
Hand Tools
Some hand tools you’ll need include a mallet, tape measure, and a saw. These tools are used for cutting and adjusting planks during the installation.
Power Tools
Power tools, such as a flooring nailer or saw, will make the installation process quicker and easier.
Flooring Materials
Be sure to choose high-quality materials that suit your home’s style. Consider kitchen remodeling services if you plan on installing flooring in the kitchen.
Preparing Your Space for Hardwood Flooring Installation
Preparing your space is crucial for a smooth installation. It’s important to remove existing flooring and assess the condition of the subfloor.
Removing Existing Flooring
Before installing hardwood floors, it’s important to remove any old flooring. This ensures that the new hardwood is laid on a solid, clean surface.
Assessing and Preparing the Subfloor
Check the subfloor for moisture or damage. A solid subfloor is essential to ensure your hardwood floor lasts for years.
Acclimating Your Hardwood Flooring
Acclimating your hardwood flooring before installation is crucial for preventing expansion or contraction. Let the wood sit in the room where it will be installed for a few days to adjust to the temperature and humidity.
Why Acclimation Is Crucial
Acclimation prevents your hardwood from expanding or shrinking once installed. Without it, your floor might buckle or gap over time.
How To Properly Acclimate Hardwood
Place the hardwood planks in the room for 48 to 72 hours before installation. Keep the room temperature and humidity stable to ensure optimal conditions.
Installing the First Row of Flooring
Properly laying down the first row is essential for a successful hardwood floor installation.
Setting Expansion Gaps
Always leave a small gap between the wall and the first row of planks to allow for expansion and contraction.
Securing the Initial Boards
Using a flooring nailer, secure the initial boards. Ensure they are straight and aligned properly.
Continuing the Hardwood Flooring Installation Process
Once the first row is installed, continue with the rest of the planks. You may need to use a flooring nailer or stagger the joints to ensure the best fit.
Using a Flooring Nailer
A flooring nailer is a tool designed to speed up the installation process. It ensures the nails are securely driven into the planks.
Staggering Board Joints
Staggering the joints of the planks ensures a natural, seamless look. This also helps improve the floor’s stability.
Dealing With Obstacles and Special Cuts
During installation, you may need to cut boards to fit around vents or doorways.
Working Around Vents and Doorways
Measure carefully and use a jigsaw to cut planks around vents and doorways.
Cutting Boards To Fit
Cutting boards properly ensures that they fit snugly into place. Be sure to measure multiple times before cutting.
Installing the Final Rows of Flooring
Once you’ve laid most of the flooring, finish the job by installing the final rows.
Finishing With Face Nailing Techniques
For the last rows, face-nailing may be necessary to ensure they stay secure.
Using a Pull Bar for Tight Spaces
A pull bar helps pull planks tightly together, ensuring there are no gaps.
Finishing Touches for Hardwood Floor Installation
After installation, there are some final steps to complete.
Filling Nail Holes
Fill in any visible nail holes with wood filler for a clean, polished look.
Installing Baseboards and Trim
Add baseboards and trim to cover the edges of the flooring for a neat finish.
Caring for Your New Hardwood Floor
To ensure the longevity of your hardwood floor, proper cleaning and maintenance are essential.
Initial Cleaning and Maintenance
After installation, give your new floor a good cleaning to remove any dust or debris.
Long-Term Care Tips
Regular cleaning and maintenance will keep your floor looking great for years to come.
How Do I Install Hardwood Floors?
How do I install hardwood floors? By following the detailed steps and using the right tools and materials, you can install hardwood floors successfully. Ensure proper preparation, acclimation, and installation, and you’ll enjoy beautiful and durable hardwood flooring for years. If you need professional help, consider contacting us to schedule a consultation.
Ready to Transform Your Home?
At Mazzamuto Construction, we believe great spaces start with thoughtful planning and skilled craftsmanship. Whether you’re exploring ideas or ready to build, our team is here to guide you every step of the way. Let’s bring your vision home—reach out for a personalized consultation today!
Frequently Asked Questions
1. How do I install hardwood floors?
Learn about the steps involved in hardwood flooring installation.
2. How much does it cost to install hardwood floors?
The cost depends on the type of hardwood and the size of your space. Get a free estimate for more details.
3. How much is hardwood flooring installation cost per square foot?
The typical cost ranges between $6 and $12 per square foot, depending on material and complexity.
4. What type of hardwood is best for flooring?
Explore the different hardwood options that suit your space and needs.
5. Can I install hardwood floors myself?
While it’s possible, hiring professionals ensures a quicker and more accurate installation.
Key Takeaways
- Hardwood flooring installation is a multi-step process that requires proper planning and preparation.
- Acclimating the wood and ensuring a solid subfloor are crucial steps.
- Hiring professionals like Mazzamuto Construction guarantees a smooth and efficient installation.
- Preparation is crucial for successful hardwood floor installation